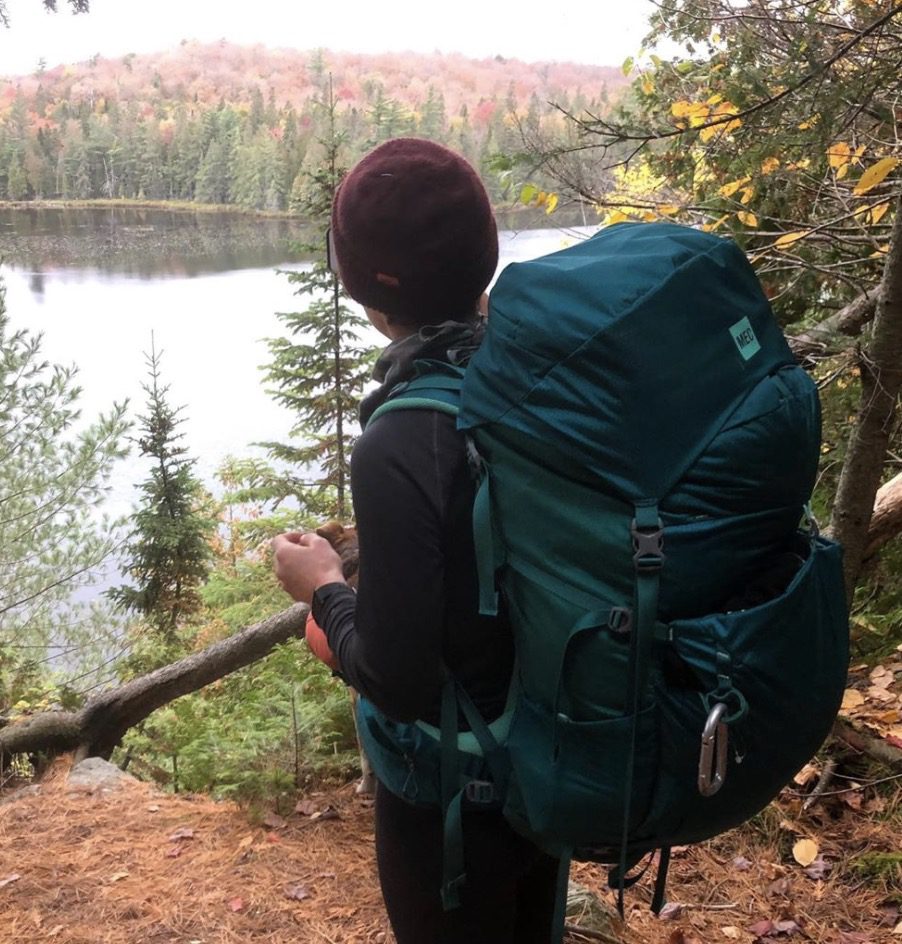
We just got back from speed-hiking the La Cloche Silhouette Trail in Killarney Provincial Park—and that trail is freaking HARD! It’s nearly 80 kilometers (about that if you walk through the George Lake Campground in order to make it back to your car at the one end of the trail) and the terrain is rugged AF. There are creeks, dam crossings, huge rocks to scramble up and over, and a couple of pretty treacherous descents down the Falls and the Crack. In the buggy season (ahem, now), you’re going to be assaulted by mosquitoes (the little buggers CAN BITE THROUGH EVERYTHING), and if you’re us and refuse to wait for the storm to pass, navigating wet rocks in the rain can mean a lot of comical slips. Not that I laughed at Peter or anything.
(Before we dive in—Have you heard our podcast with Eric Batty all about hiking and camping?)
So, I’m not really one for race reports, per se, but I did want to write this one up for a couple of reasons. 1) it’s actually helpful to me in terms of an upcoming BIG SCARY GOAL, and 2) No one that I’ve found has done this type of hike on this trail before. There are a few ultra-runners who’ve set fast times (Eric Batty included) who have their reports posted, and there are a lot of hiking reports that are in the 5-10 day range for getting through the trail. But if you’re interested in hiking it and camping, but doing it quickly, there isn’t a ton of intel out there. And that’s where this comes in!
Speed hiking is ABSOLUTELY not for everyone. This was a combination of an endurance challenge + some fun camping and time together offline for Peter and I, but we’re well-conditioned athletes, albeit not exactly hikers or backcountry campers. We prefer challenges like this—if I was to take a week off to do a trip to Killarney (full post on this coming soon), I’d be more inclined to set up a base campsite at the main park, and then do a variety of day hikes/runs/canoe trips/swims etc. versus doing a longer tour of the La Cloche trail. So, we had our reasons for electing to speed-hike, and it was a super fun goal for us.
The Approach to La Cloche
We started our hike pretty late—10AM—since we were driving to Killarney from Collingwood (about a 3.5 hr drive). In retrospect, we agree that we wish we’d car-camped the night before at the park for an early start, but hindsight is 20:20! So, with a 10AM start, we aimed to hit the trail in the clockwise direction, saving the Crack section for last. (Sidenote: I had read that getting the permit for hiking and saying you planned to do it in under three days meant you got a High Risk stamp. I was sort of bummed that we didn’t get stamped.)
La Cloche Campsite Planning Tip
Umm… There aren’t mile markers on the campsite list. That meant that we epically screwed up our calculations and picked a campsite that was waaaaay farther than halfway. So, as the day wore on, we realized we probably wouldn’t make it there, and ended up opting for another site instead. It was still nice but we lucked out that it was uninhabited (except by mosquitoes). Do your calculations on how far each site is from each other, and pick accordingly! We ended up at H22, which was nice… But we were also less far along the trail than we realized.
(There’s a great guide to the campsites here.)
George Lake to Artist Creek Segment
There’s not an official way I’m breaking these segments up, just splitting them into sections that make sense to someone hiking quickly. The first section of the trail is pretty bog-heavy, and avoiding soaking your feet early on is key. We didn’t use poles, but we did start grabbing sticks to help us work our way over some tricky creek sections, as well as a much more intense dam crossing. (Seriously, it was pretty precarious!)
Overall, I would say this part is primarily flat, with slight ups and downs, but nothing too memorably steep or long. Barring the water crossings, the trail is rocky and root-covered, but not insanely technical. But take your time on the water crossings. I got a soaked shoe pretty early on, and it wasn’t the most pleasant to hike the rest of the way feeling soggy! (I eventually swapped out my socks.)
As you get to Artist Creek, there are a couple of private property labeled cabins along the way. It’s weird, since there are no other signs of people ANYWHERE, so it’s a little jarring to suddenly have a cottage pop up in front of you. And then, you turn away from the cottages to head up a creekbed towards Topaz Lake. Until this point, it’s relatively flat (as flat as crazy singletrack ever is), but this is where the work really starts as far as climbing goes.
Artist Creek to Moose Pass
Sidenote: A lot of blogs and even our maps mention that there are a lot of tricky turns along La Cloche. I don’t know if they’ve done a ton of work in the last year on trail markings, but we found it super easy to follow and only almost missed a turn once, towards the end near The Crack. So don’t freak if you’ve been reading that the trail is hard to follow. The plastic blue blazes are on a ton of trees and almost always really easy to spot!)
The trail goes past a bunch more lakes, through the woods, and very, very little of it is what I would call “easy.” It’s almost entirely ‘pay attention or wrench an ankle’ style of hiking. The Falls—both going down and going up—are arguably the most treacherous part of the entire hike. (It’s called Moose Pass on a lot of the maps and sites.) Getting down this super steep chute of slick rocks—with a pack—was tough, and then scrambling up a waterfall with water coming down (not much, just enough to be slippery) was a huge challenge.
After about 9 hours of hiking, we agreed it was time to stop aiming for Boundary Lake and start thinking about finding a campsite sooner rather than later. Peter’s feet were bugging him, bugs were bugging me, and we were feeling the effects of a full day of hiking… We weren’t feeling terrible or anything, though—we just realized if we stopped sooner, we’d have a bit more time to set up camp (since we’re new to camping and things like hanging bear bags) and actually get a solid night of sleep. We knew the next day would be tougher, so we wanted to prep well, even if it meant a few more kilometers the next day.
We camped at H22 (sorry, Killarney—we switched sites!), which is described as: “This site is on an unnamed pond on the northern ridge. While not as nice as some of its larger, deeper brethren, it is a good spot to spend the night. The trail does go right past the campsite, but traffic isn’t too heavy on this remote stretch of the circuit.” While the site was great, I wouldn’t recommend stopping here on night 1 of a 2 day speed-hike, as it’s not far enough into the trail to make for an easy day 2.
The pond was more like a small lake, and it was lovely for hopping in for a quick cool-down when we got there. And it helped chill out my beginning-to-itch welts all over my legs. (Yes, I wore pants, long sleeves, a bug net and had on bug spray. Did not help.) It’s about 32.5 kilometers into the trail, so we had a loooong way to go on day 2, especially since we had to walk back through the full campsite to get to the van. Luckily for us, we had a GPS running from a Strava file that, as it turned out, had started at the highway parking lot, not the campground. (More on that towards the end, but basically, where we stopped for the night, we believed was 36.5 kilometers into the trail, so we thought we were much closer to halfway than we actually were. This was probably a good thing for morale at that point!)
Moose Pass to Boundary Lake
Camping here, we knew the morning was going to start out tough: there’s a pretty hefty descent right away after site H22, heading past another campsite and continuing down, down, down. It was slick from morning dew, and that made it more challenging, but ultimately, it was tame compared to The Falls from the day prior, since none of the slips would involve looooong drops. (Trust me, I fell a couple times here and it was fine.) Once you’re about an hour past H22, though, the trail actually gets less challenging for a bit. Expect a lot of heavily forested ups-and-downs, with a bit of flat singletrack that’s actually pretty easy to hike mixed in—we were able to easily chat while hiking along at a pretty brisk pace.
Day 2 was going to be a long one: We were out hiking for just about 13 hours, from 6:45AM until 8PM with minimal stops. (Probably about an hour’s worth of stopping, with one longer snack break and a few water refills/snack grabs mixed in.)
Pro tip when filling up water bottles: There are a ton of lakes, but there are also a lot of sections of trail that don’t see big bodies of water for a few kilometers at a time. I’ll talk more about fueling in another post, but my major recommendation is that if you hit a section where you can SEE a lake and you know you need water, keep walking until you start turning away from the lake before committing to bushwhacking down to it. Twice, we made our way down steep banks in order to fill our bottles, only to make our way back up, walk another 200 meters, and realize that the trail did, in fact, bring us right to the water’s edge. So just hold your horses and only bushwhack down to the lake when there’s no other option. We wasted probably 15 minutes of extra walking because of this, which isn’t a huge deal, but it does add up when it’s straight up and down to get to the lake and you’re trying to be quick.
Boundary Lake to Silver Peak
As you approach Boundary Lake, you’re hitting the part of the trail that’s mostly up and over huge slabs of rock, so your feet are about to take a bit more of a beating compared to the squishy forest floors. Lots of walking on rockface here—so pay attention to the blue blazes but also to the cairns that are set up to show you where to follow the ‘trail’ along the rock. Then, you’re off the rock and into singletrack again, as you head towards Silver Peak. This is where you start running into people: there’s another way into the park near here, so people can day-hike up Silver Peak and check out bits of La Cloche. It’s also a popular canoe portage point, so don’t be shocked if you suddenly run into a few big groups! Silver Peak’s ascent isn’t part of La Cloche, so unless you’re taking three days to speed hike, I wouldn’t recommend heading up it. We passed the base of it and hit sweet, sweet doubletrack.
Silver Peak to The Crack
First, you get fooled by a couple kilometers of really open doubletrack. Which, honestly, was such a relief that I almost cried tears of joy—it felt so good to have a few minutes of just walking and not stressing on where each foot was stepping. So, take advantage of those moments. Because before you know it, it’s back to scrambling up and over rocks. As Peter said, he thought we were at the Crack about 15 times before we finally got to it: This part of the trail feels like you’re caught in a Sisyphus-styled punishment of going up a steep, rocky singletrack, emerging on a rockface, navigating that, coming down a steep, rocky side of the huge rock, then hitting a bit more singletrack before going back up. Finally, though, you make it to the Crack. Red signs start popping up next to the Blue blazes that mark La Cloche, but don’t freak out: follow red or blue at this point, they lead to the same place. We spent way too much time worrying about seeing a red blaze instead of a blue one, and almost missed the Crack itself because of it. Also because it basically looks like a giant rockslide, not a trail. But don’t freak: it’s not nearly as technical as The Falls, in my opinion. I thought it was one of the less challenging descents of the day, honestly. It’s gentle enough that if you get low, you can basically sit your way down. But once you’re down, you’re not done with the hard stuff. There are still quite a few ups and downs to get through before you hit the easier portion of trail.
The Crack to George Lake Campground
The map lies.
Just saying.
Seriously, though. After the Crack section, it’s theoretically supposed to be around 6 kilometers to the campground, but since there isn’t really a designated “the Crack ends here” marker, this is a loose translation. You get through the Crack, but you’re still scrambling over massive rocks, doing a whole lot of rock climbing-styled movements, and scampering up and down pretty intense singletrack sections. Then, you hit another lovely stretch of doubletrack and think you’re almost back… Until you hit a sign—the first you’ve seen all day—that reads 1KM to highway, 6KM to George Lake. There’s a lovely well-bridged doubletrack that leads out to the road, and it’s tempting as hell to consider heading out there and hitch-hiking back to the van.
But at least you now now that it’s 6 km to go. So, we headed off into more singletrack, with a few bridges thrown in at first. Then, the bogs start up again, and tiny creeks start appearing more and more frequently. Then, there’s a massive dam crossing. (You can almost hear the campers on the other side of it laughing at your struggling…).
Then, FINALLY, you hit a sign that says you’re 600 meters from the campsite. Pro tip: DO NOT START SPEEDING UP. This $hit gets technical, and steep. Suddenly, you’re scrambling up your millionth rock face of the day, and it keeps going up. It feels more like 1.5 kilometers than 600, and I wish I had a GPS running to test that theory. But even if it is 600 meters, it’s a freaking hard 600, not a casual walk out of the woods, so don’t freak and make a break for it. Enjoy the views for a second, and take it slow.
When you do make it back to the trailhead, drop your pack. I wish I’d remembered this line from the Killarney Outfitter’s site: “If the vehicle was parked at the end of the trail on the first day, jump in and head out. Otherwise it is suggested to leave the packs here and hike through the campground to retrieve the vehicle and return to pick up the packs.”
We did not heed that advice and when we got through, we had a looooong walk up the gravel road with our packs to get back to our van. I wish we’d thought to drop our packs and come back, because at that point, I was cooked! 13 hours of hiking, and my body was pretty much DONE when we saw the sign at the end of the trail. (It’s amazing how much work your body is capable of when you’re trying to make it back before dark.)
The Finish / A Few Thoughts
We were out for a total of 34 hours, and hiking for about 22.5 hours of that (including stops for water / to grab food out of our packs and switch socks). Peter and I are both pretty seasoned endurance athletes, but neither of us had ever hiked with packs before, so there were a lot of unknowns. The packs were quite heavy as I wanted to have enough food with us for two nights if we needed to take longer, and we probably had about 10lbs of food that made it back to camp with us. I think a seasoned hiker who doesn’t mind a long day—and has good shoes!—can
A Note on Timing
To do this again, I would definitely sleep overnight in the park before starting out, and get moving early on Day 1. I’d definitely do a longer day—aim for 12 hours of moving time, maybe from 6 to 6, before settling down at a site (probably aiming for H33 at Little Mountain Lake, which is about 5 kilometers earlier than Boundary Lake). That way, Day 2 won’t be as long, and we would have had a bit more time for a leisurely breakfast before setting off again.
I’m going to have a few more speed-hike posts, from gear considerations to how we ate and what we’d pack differently, so stay tuned for more! (And let me know in the comments if you have any specific Qs!)
Before you go, are you subscribed to the newsletter?


