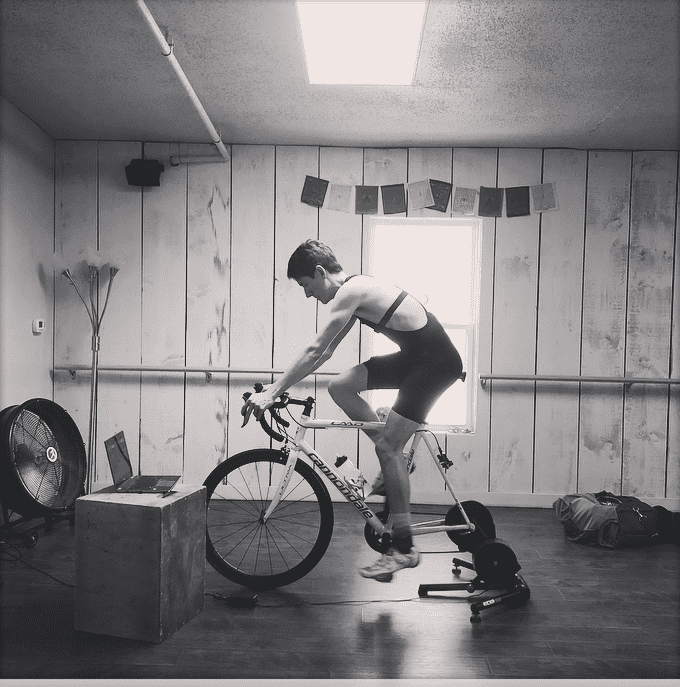
So you want to ride indoors, use a smart trainer, use Zwift?
I think it is important to remind you that you are SMART and that you always have the option of riding indoors in the same fashion as you do outdoors. That is, you can put your bike on ANY trainer/rollers, use your bike computer, shift and pedal. Use your HR/Power and FEELING (RPE) as relevant.
On a Smart Trainer, this is accomplished by using ‘manual’ mode, or by just plugging the trainer in and not bothering with your computers/screens.
‘Dumb Mode’ is a great way to simplify your training and make sure you are engaged with your workout. Shifting to adjust the load/speed/watts and motivating your efforts are how outdoors (ie. real life) works. Don’t miss this chance to practice.
Listen to your Brain, not the Computer!
Keep this idea of ‘dumb mode’ and motivating your own efforts in mind when any program crashes, when you aren’t hitting the perfect intervals (what is a perfect workout?), or for when you spend more time setting up and looking at screens then pedaling.
ERG MODE
It is tempting to ‘just not think about’ your workout and use ‘ERG’ mode. This automatic mode on smart-trainers lets you just pedal while it sets the ‘perfect workout’. Very steady intervals.
Erg is Perfect in every single way, EXCEPT for when you go back outside! Use all the modes!
Setting your own pace, shifting, adjusting cadence and having a somewhat (or largely) variable load is how outside works. This is racing, this is riding.
Smart Trainers and Online software have different modes. There is likely one where you can ride on a fixed grade (HILL) and shift/pedal to adjust your workout load.
There may also be a mode to shift to adjust as the trainer simulates a route. That seems like a great way to get close to outdoor demands since you have to adjust, think, shift as the load/resistance/terrain changes.
Right … So the part you are looking for. How to use your smart trainer.
1. Setup a Fan
Figure out a way to stay really cool. Remember what it is like outside when you don’t need a towel. If you need a towel constantly then you need more cooling.
2. Have your workout handy
Have a plan for the day. Catch yourself saying ‘I just don’t want to think about it’ … at some point (outside) you will have to think about it … quickly.
- If you use training peaks you will get your next 2 days of training emailed each day! Just open your email, review the main idea of the workout (i.e. 2 x 20 moderately hard) and get pedaling.
- The trainingpeaks.com mobile app is another tool you could use if your workouts are there. You can see the workout and then comment on it (TIP: Use your phone dictation to get those comments done easy and fast!)
- Have a plan or else you get bored and it seems pointless. If you need help with a plan check out pre-made plans with downloadable workouts like this one or Apply for your own 100% 3-Month Made for you plan
3. Zwift, Trainer Road etc. are TOOLS – Use them but don’t over-use them
- These are great tools to pass the time, perhaps add a social element to an otherwise lonely time of year and even get some harder/longer efforts in the form of group rides or races.
- While I am often listed as ‘anti-zwift’ I do think it is a great tool. I love that they sync with Training Peaks and let clients get access to my workouts.
- Be cautious with how much intensity, group rides and races you do. Be especially cautious if you are in ‘off-season’ or ‘base’ or ‘general prep’.
- These do cost money so weigh any benefit against what you could use those monthly fees for. New gear (to ride/cross-train outside), race entry, quailty food etc.
3. Free Software to download workouts and See your data on a big screen
If you want a free option I have been LOVING the free program -> Maximum Trainer. It has some built-in Sufferfest workouts, will pull in a variety of devices and allows you to upload training peaks workouts manually.
Add Visualization and Position Adjustment
- Looking up a certain hill, race or ‘Go-Pro’ on Youtube is a great and easy way to add some ‘free’ visuals for your training. Many athletes use the RedBullTV and UCI channel to motivate and visualize while doing hard work
- Phil Gaimon’s Hill TT / Strava Series is a good mix of riding and storyline
- This is an Alpe D’Huez Video I have also used (can adjust speed in Youtube Videos)
- The ‘old’ textbook-under the front wheel for climbing is a method that often gets forgotten but I think makes some sense from a position/join-angle perspective, and worst case provides a change in your position on the saddle. (thanks to Mike Mandel for this thought on twitter!)
Isolation is not all bad – Embrace Your Context
Work on things that make the time go by and maximize the context (ie. you are not outside so work on things that are best worked on inside on the trainer).
- One leg drills help you learn to clip out and clip in quickly and smoothly – add some hip work by not resting your foot but floating it (carefully) around the pedal
- Seated Force drills – lower rpm work and high force to build specific on-bike ‘strength’ and power
- Steady endurance and muscular endurance – this is missing for many mountain bikers and those who live in urban areas. Embrace the ability to keep a steady load on your legs.
- Combine strength/core and riding – this is so underutilized but holds such tremendous value. Don’t get so stuck in the workout average wattage or ‘zwifting’ that you don’t get off to mix up the workout and make your other muscles work
- Wattage – while more common now on all bike types and for many athletes, the ability to have power on smart trainers and even the speed-derived ‘zwift-power’ or tracking speed with a rear wheel sensor gives athletes a taste of a ‘performance metric’ for testing and progressing workouts each week.
Resources
- ‘maximum trainer’ – Free computer application for use with trainers, heart rate monitors and muscle oxygen
- Perf-Pro is a software (paid) that lets you upload routes/races from your GPS to simulate the terrain indoors.
- Connect Trainer road to training peaks http://blog.trainerroad.com/how-to-upload-your-trainerroad-workouts-to-trainingpeaks/
- Garmin to Training Peaks -> https://home.trainingpeaks.com/garminconnect
- Zwift to Training Peaks -> https://support.zwift.com/hc/en-us/articles/207581866 and https://www.trainingpeaks.com/blog/a-quick-how-to-guide-for-trainingpeaks-zwifters/
- Use the Training Peaks Mobile App to add comments after setting up the automatic updates. Think WHO/WHAT/WHERE/When HOW
- Use HR4Training App to add daily metrics to training peaks (2 min process that gives HRV/HR/metrics + a field to write notes)
- This is another post on more ideas for commenting and enhancing our communication


